
To create and submit a blog post in the IET EngX community, visit the Community Insights page and select the '+ New' button in the header banner. This will launch a new blog editing template with two tabs titled 'Write' and 'Options'. You'll add the content for your blog post in 'Write' and add a header/splash image and manage other post settings in 'Options'.
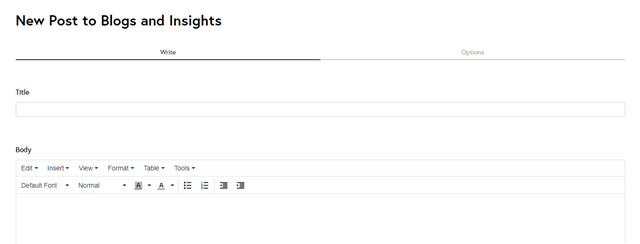
Write your post in the 'Write' tab
Title
Fill in the 'title' field with the title of your blog post, for example 'Skills for Net Zero and a Green Recovery'. Make sure the title gives enough information for readers to understand whether the blog post is relevant to them. The title will also form part of the blog post URL.
Body
This is the main body of your post and should be informative; your own words (don't copy text you've seen somewhere else) and engaging. Blog posts are long-form/magazine article style content of around 500 words minimum and written in a conversational style and tone. When writing for the engineering community on this site there are a few top tips:
- Make sure you are writing for an international audience. If your blog post refers to government or regulations be specific about the country to which you're referring.
- Inserted links will render in IET purple when your blog post is published. Formatting them in bold will make them more visible. Just pasting a URL will not hyperlink it.
- If you are inserting links to other online areas, edit your links and set them to open in a new window to make sure your readers can navigate back to the blog post easily.
- Always paste as plain text and use the content editor to add formatting.
- There are a variety of tools in the toolbar for adding formatting, hyperlinks, emojis, polls, embedding videos etc.
Uploading files and links
To insert a file in the body of your blog post, make sure your cursor is where you want the file to be inserted, select ‘insert’ in the content editor, click ‘image/video/file’, then ‘upload file’ and select the file you want from your computer or phone file directory.
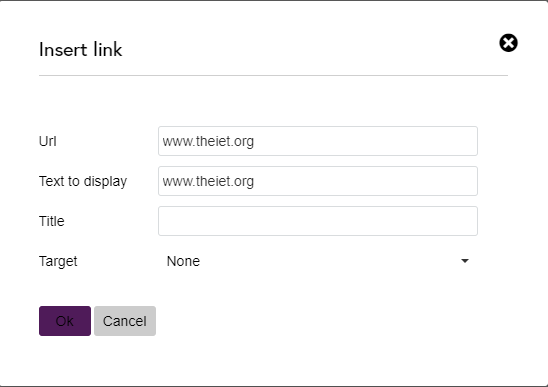
The default presentation of an inserted file is a file type icon or file preview, but you can right click your file and select ‘display as link’ if you prefer. If you choose to display as link the full file link with upload information will be displayed, and you will want to edit the link to something a bit more presentable. Click into your link, select ‘insert’ and ‘link’ and amend the ‘text to display’.
You can remove files by clicking on them to display the editing menu and selecting ‘remove’.
A single file or link can also be added as an attachment to your blog post by using the ‘attach a file or url’ field toward the bottom of the ‘new blog post’ page.
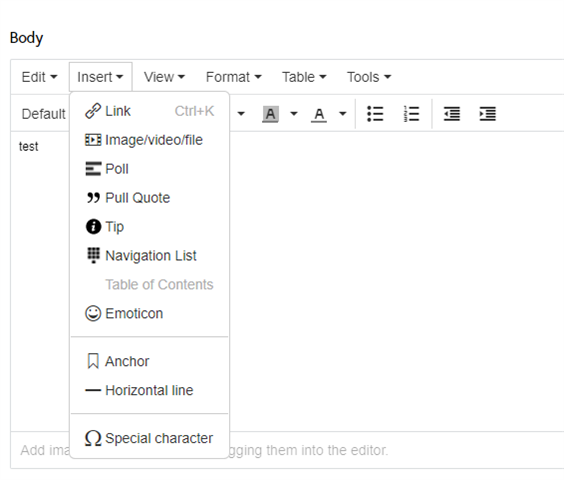
Adding images
There are three ways to include images in your blog post.
- To add a header/banner image to your post, select the ‘options’ tab at the top of the page and upload your image in the ‘post image’ field. This image is also used in the thumbnail view in the list of all posts in the blog as well as the main image if your blog post is used as 'featured content'.
- Insert an image within the body of your post by clicking ‘insert’ in the editing toolbar then 'insert image/video/file' and follow the file upload instructions as above. Images can be positioned by clicking on them to display the edit menu, then choosing your preferred position. Click on the image and use the corner tabs to resize.
- Paste the image directly into editor, highlight the image and 'edit' to edit the image properties.
You should always edit your images and add alt text to accurately describe what the image shows. This helps community members who use assistive technology when viewing the site.
Adding tags
These are the keywords associated with your blog post and are used to share your post with IET EngX members who are interested in those topics. Choose words from the taxonomy list that accurately categorise the content of your post. If you're unsure of the available tags you can see a list at https://engx.theiet.org/member/tags. Please only choose tags that relate to the content to ensure that topic search results return useful information.
For more information about tagging in IET EngX please read our tagging FAQ.
Preview your post
You can preview your post by selecting 'tools' in the body editor and then 'preview'.
The ‘Options’ tab
Move to the second tab of the ‘new blog post’ template to choose settings for your blog post. Settings here are optional, however it's a good idea to add a blog post image and enable notifications for comments.
Change the post url (optional)
The title of your blogpost is used by default as the url, however if you prefer to use a different url, you can change it here. Only hyphens, lowercase alphabetical and numerical values can be added to this field.
Add a post / banner image
This is used as both the banner/header image along the top of your blog post, as well as the thumbnail image that is displayed wherever your blog post is shown in a list of posts. See Choosing your blog post banner image for further guidance on choosing suitable images.
When you add an image, remember to include ALT (alternate) text. ALT text is used to help community visitors who use adaptive technology (such as screen readers etc) understand the contents of the image so please add a good helpful description of what the image depicts. Please do not start your description with 'Image of...'
Set a publication date
You can choose a date in the future to publish your blog post, and you can also select a specific time. If you do not choose a date your blog post will be published as soon as it is reviewed by the EngX Team.
Post summary options
Here you can select the summary that is displayed with your post. Additionally this summary is exposed to search engines. There are three options:
Automatic summary - this is the default setting. The summary will be selected from the first 155 characters of your blog post.
No post summary - will leave your summary blank.
Custom summary - you can add your own summary. If you choose this option please note that summaries should be 155 characters or less.
Notification settings
Tick this box to be notified when someone comments on your blog post. To reply to specific comments you can @mention community members.
Search engine optimisation
You can use the options here to specify the title used by search engines to describe your blog post, and to specify the key words that search engines can use to categorise your content.
Publishing your blog post
Once you’ve created your post and are happy with it, you can click the ‘Post’ button. Your blog post is added to the queue for review by the EngX team before publishing. Once published your post will be seen at the top of the ‘recent blog post’ list, on the IET EngX home page and in the list of blog posts on your profile.
Save as draft
If you are interrupted before you’ve finished writing your post, you can click ‘Save as Draft’. This closes the edit screen and saves your post until you’re ready to continue editing it.
To find your draft, go back to the Community Insights page and you'll see a purple banner at the bottom of the screen telling you how many unpublished posts you have, and a link to 'View Posts.'
The 'View Posts' page will show you posts which are in draft, scheduled or pending review.
Editing a blog post
You can edit your blog post at any time by clicking on the ‘Edit’ button to the right of your blog post.
Editing a post once it’s been published should be restricted to correcting typos or formatting rather than changing the entire context of the post.
Deleting a blog post
To delete your blog post, you need to edit it and click on the red 'Delete' button. If you're sure you want to delete it, click 'OK' on the pop-up notification. Your post will have been deleted but it may take a few minutes for the search index to be updated.