This discussion is locked.
You cannot post a reply to this discussion. If you have a question start a new discussion

TP&N board

Former Community Member
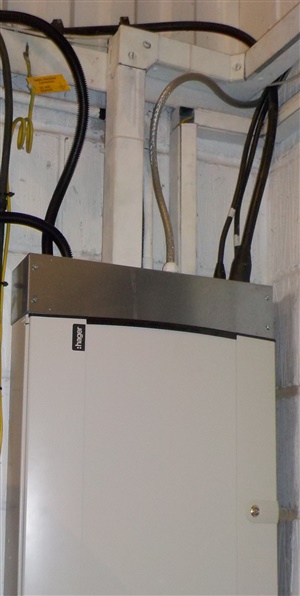
Hi all, what's the best sequence when installing a new TP&N board. 

1) hang on wall and then build. 

2) build and hang on wall

3) none of the above

Hate doing things twice!

Will be installing steel trunking to bring cables into DB and tails from below using steel trunking and 32mm bushes. 


​​​​​​Regards Ts. 


​​​
  • The best way is get someone else to do do it. Sorry was just in a silly mood
  • Assuming that it is reasonably accessible, I can think of three reasons to hang first.


    (1) It may be easier to get to the fixing holes.

    (2) It will be lighter.

    (3) It won't move when you do the fiddly bits.


    If you need to drill any holes, do that on the bench.
  • Hang on wall and build.  But decide how your trunking is coming in first, allowing for bends.


    As you are going to come in via trunking above.........it is best to have a horizontal 4" or 6" across top of DB. Lots of options for connection of cable management but keeps the nice big slot in the top of the DB body and avoids EMC issues.


    Depending on make of DB, most have removable plate on top with a rounded rectangular slot left on the DB body. You want that as your way in, so dump the plate. Again, most have an option of a "trunking kit" , a 6 " or  4 " box trunking to suit top of DB and associated holes to line up with fixings for the , now dumped, top plate [ a horizontal box trunking across the top of DB, can overlap or be flush or you can even have your new trunking come in the ends or the top or what ever. It is nice to leave flexibility for the future, say conduit or SWA, so it is good to have plenty of spare space on the top of this "adaptor trunking" / trunking kit"].

    The kits come with come with end caps. You can make one "kit" yourself, but it is time consuming. The pre-fab ones have luverly rectangular strip knock out that match up with the rectangular aperture on the top of the DB body. You push these out and file or install chunky grommet strip or use an insulator sheet with a slot to protect against sharp edges.


  • I am in agreement with the above including Kelly's suggestion ?


    Plan layout

    do any metal work on box

    fit box

    get cables into box

    install the bits and wire up

    Agree that trunking can make it easier especially if any SWA can be terminated on the trunking rather than the box, also makes any future changes easier.
  • 982573b04a90c93cdd480f5121a36a06-original-positek-l7-for-iet.jpg     

    This kind of thing. Its a replacement of existing DB, except there is a trunking kit across the top so you can accommodate all the different types of existing adhoc cables and cable management back in.


    56dadda5c533a1b639cb51f0ee9f08a8-original-positek-l6-iet-again.jpg  

    Another one, where you can see the slot in the top of the DB.
  • Former Community Member
    0 Former Community Member
    Loving the idea of the trunking kit ??????
  • Former Community Member
    0 Former Community Member
    Just like to thank everyone that took the time to reply. That trunking kit is going to make life so much easier!!

    Ts
  • As Alcomax says above.


    I am not an electrician but how are you going to bet your 4  3 phase tails through a 32mm bush?


    As Alcomax above says a header trunking above the DB but I would add a piece of paxaolin board between the header and the DB with the slot in the paxolin slightly smaller than the opening in the DB to protect the conductors entering the board. Also if you bolt the header straight on to the board you will not be able to put the lid on without cutting the lip of the lid away. Rather than straight on the wall a lot of sparks put a Unistrut frame on the wall and bolt to that. Mount the empty board, perhaps just the incomer isolator fitted. fit the MCBs/RCBOs, then put the ends away one at a time after testing each one. 


    Just out of interest when you were serving your time did you not watch/do a similar installation?
  • I would not recommend Paxolin.
  • Perhaps - because I really enjoy a bit of metal work, I often install top, one side and bottom trunking. This also allows for circuits like underfloor bus bars or underfloor circuits in my usual environment - which is offices - to get terminated at the bottom of the DB. (In the bottom trunking) 


    For one small 3 phase DB - I set up a work bench and build the empty DB and trunking on the bench, and once constructed, lift the whole lot into position on the wall, and mark out the DB mounting holes. (use a bubble to ensure its straight)  I install uni strut directly over those DB mounting holes position, and hang the DB and trunking on uni strut. The trunking also needs some uni strut so this is not the easiest way but it does end up looking pretty good. 


    Obviously if I'm doing MCCB pannels and multiple three phase DBs in one area then this is impractical and I will need to build it on the wall piece by piece. 


    You can build it on the wall piece by piece but you tend to mount and dismount each piece a million times... or perhaps I say I tend to do this.

    The trunking 45 degree corners are especially difficult to do piece by piece on the wall, but fairly easy to do on a work bench. It often becomes a two man job to lift and mount the single DB assembly but it only takes a few moments. 


    I always use paxolin between trunking and DB - I'm a big fan of paxolin - and have a large sheet of it always in storage, ready for similar jobs.


    If you drop the top and bottom plate off the 3 phase DB - this will give you a template for the paxolin, into which you can cut a 50mm slot - for the cables to pass through. On a big three phase DB - I don't want the tails coming in at the top and all of the circuits going out at the top - it just gets too crowded. Also with top and bottom entry - and if you take your circuits through both top and bottom, your DB sides don't get too full. (Depends on the size of DB you're fitting)


    The paxolin will allow space too, for the trunking lid and DB lid to go on and off easily.